Cebu has been subject to several blackouts throughout the years especially during typhoons. Is your
real estate property in Cebu prepared in facing this drawback? Worry no more! This simple yet creative idea would not only turn that gloomy space into a luminous one but it would also prepare you for emergencies. All you need are these materials:
a large Mason Jar
 |
| (amazon.com) |
cord set (with screw ring)
 |
(ikea.com)
|
light bulb
 |
(wikipedia.org)
|
And for the optional materials:
- spray paint
- hanging hooks
Tools needed:
First, take the lids off your mason jar. The jar typically has two lids. Take the flat one. Trace the end of your cord set (the circular one) at the back of the Mason jar lid. Get your nail and hammer and start pounding the nail along the traced circle on the lid. This step is a little tedious but don’t worry, it will all be worth it. This process would make the tin lid weaker so the center part would be easier to remove. Punch a hole in the middle. Get your pliers and carefully cut the punched hole. This is how it should look like.
This process is optional but if you’d like to add some color to your lantern, you could spray some paint on the top of the cord. Tape off the part of the cord that you don’t want to spray paint on and paint only the top part. After everything is dry, take the lid (the one you punched a hole into) and put tiny holes again along the circle just so the heat can escape when used.
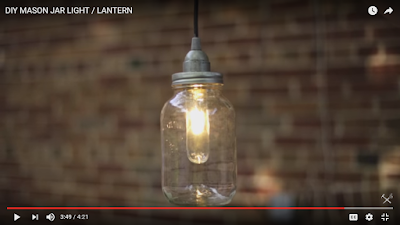
For the final step, take your cord set and put the screw ring around it. Take the tin and wedge it inside the cord set. Take the extra screw piece for support and jam it in. Screw in the light bulb. And finally close the lid. You did it correctly if it looks like this:
You could hang it using hanging nails, or even make your very own chandelier! These are just some amazing ideas to spruce up your real estate property in Cebu. If you’re having a hard time following these steps, here is a video tutorial.


Leave a Comment